Wednesday, December 12, 2012

Fashionista's Cake

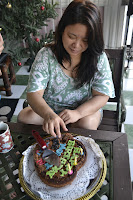
It's been a weeks since the last blog, I'm just busy with my schedules this month. We are so busy making cakes for our clients and I just want to share with you one of our very critique client, which happens my own brother. Yes, he ordered a cake and he said that this will be a surprise cake for her beautiful girlfriend. So, we made this cake for 3 days because he wanted to give it 6 days before his GF's birthday. Well, we asked him what will be the designs and he said so many things and ideas and more suggestions coming when we're making the cake. Until we finalize with her gilrfriend's favorite cosmetic brand and bag.


After all, we just make all this things make to life. And we gladly make it. Her Girlfriend was happy with the surprise cake. She wouldn't thought that her dream cake did came true.

I just hope that I had a picture of her, which is a priceless facial expression when she saw the cake.

Hope you like it! and thanks for reading my blogs. 


Wednesday, November 28, 2012

D.I.Y: Princess Scroll Invitation

My daughter Azrielle Jermiah's birthday is so soon and she wanted to have a princess party. It's so hard to throw a very detailed party if you are on a tight budget. You have to think twice what will be your decorations and your supplies that will be exactly on your budget but something fun and kids would really love too.

First things first, is the invitation. A personalized royal invitation is so fun to do. This is very important to each and every party. Your close friends and family will surely be glad if they received one.

I thought of a classy old-school invitation, and before they're using a scroll paper that was announced by the messenger of the royal family. How cute it is??

So, to make this invitation all we need are:
  • A white paper
  • a brown food coloring/ coffee ( mix with water)
  • a pink ribbon ( or any color)
  • a black pen 
  • a basin
  • candle stick
  1. Put your white paper on the basin and then slowly pour the brown mixture ( brown food coloring w/ water or coffee dissolve in water). Soak it up until 3 - 5 minutes. 
  2. Gently remove the paper out of the basin, it may reap easily. 
  3. Put it on a place where the Sun is, so it will quickly dry up.
  4. Once its dry, get a candle stick and burn the side of your paper to add a little effect of a vintage paper.
  5. Then draw some vines on the upper side of the paper, just to have a little cuteness on it.
  6. Scroll the paper and tie the ribbon around it.  


You can now send it to all of the Princes and Princesses of your magical land. 

Hope you like it and thanks for reading!

Wednesday, November 21, 2012

FOTD: Inspired by Eyahnism "Pink Tuesday"

I'm planning to wear my pink floral skirt on Sunday and I was browsing with other bloggers site if they have a make-up look that suits with my outfit. I saw Eyah's blog about her Pink Tuesday and I'm curious about it. I find her make-up so cute.. Girly, kikay, its so feminine. So, I picked up my make-up pouch and I can't wait to do it on Sunday, so I made a trial. I hope I gave Eyah's turorial some justice. I hope she likes it...


I'm ready to go on Sunday... Yipeeeee!!! Thanks Eyah...

Thanks for reading... TATA!!!

Tuesday, November 20, 2012

Surprise Birthday for my Mom


It's my mom's birthday today and last night was the hardest part of the plan. My sister Daniela and I cooking some good plans on our minds, we're thinking of what gift we could give for our beloved Mom, but then again we don't have enough money and it was 10:30 pm (so late!) when we just decided to make her a cake. Sadly, our ingredients are sooooooooo incomplete. We don't have butter, so we use oil for the cake, so it not a problem anymore. We have a lot of stock Fondant in the fridge, however, we still need the butter for the frosting (that's the problem). Oh!!! we still can't make a beautiful fondant cake for her... And I second thought of the banana cake since it is my expertise, but then again...we don't have bananas ( another problem)...So, I come up with a my own version of "Fudge Brownies". I was afraid not get the perfect texture of it since the ingredients are all alternative. Anyways, while I'm doing the fudge brownies, my sister Daniela is moving her ninja moves upstairs. She's watching over my mom cause we don't wanna messed up our surprise for her. Daniela goes downstairs to check what I'm going, going upstairs to check our mommy, if she was awaken by the noise we creating downstairs. Up..down..up down... what a move Daniela...! And we got our successful night of hiding our surprise. 


It was 5 in the morning and Mom was awake and without a second thought, I jumped out of my bed and check if she's downstairs and have checked our surprise for her. Well, the good thing is, she's still on their bedroom, so I sneak out downstairs and walks slowly through our hallway holding the fudge and 3 little candles with lit. I woke up Daniela and gave her the cake, while I will sing the birthday song and my Dad is somehow pretending he's just checking something on his camera. Out of my Mom consciousness, my Dad filming her. 


It was a paid off when we saw the smile on her face and how she love the cake. We ate the fudge this morning together with Pancit Canton that my hubby cooked.


And what I think... We gave her the most delicious and Best cake ever because we baked it with LOVE...

HAPPY BIRTHDAY MOMMY!!!! AND THANKS FOR EVERYTHING!!!

Monday, November 19, 2012

Pre-Christmas giveaways

It was a crazy feeling....

I can feel now that the CHRISTMAS is just around the corner..

 Giveaways here..giveaways there!!!.

Another bloggers are collaborating for some awesome giveaways to all of us...

Come and join now...
Click here
"Merry Christmas....hohoho!!!"
Hope you win too!!!!

TATA!

DIY Photobooth stand


Just browsing with my little Peia's birthday picture and I saw her mermaid tail photo booth stand that I and my brother Justin did. It was fun doing things like this, especially, when you see the people love to take a picture on it. It's not that hard to do it, you just need a lot of patience and creative mind. I remember that we are so excited on my daughter's birthday and we wanted it to fun for kids and as well for the adults, we thought of renting a photo-booth which costing of Php 2,000 - 2,500 per 2 hours. It's too expensive and not practical and we thought that kids won't love that. Since, my brother got his new camera, we just create a photo-booth stand out of the box.So, let me help you out to do this mermaid tail photo-booth stand.


  • First, you have to cut the box according to your desire height and wide, then painted it with white but as brush it, give some texture on it, so that if you decided to use blue paint, it will you a nice water effect. Then cut the sides triangular shape and it will be the hold of your photo-booth stand.

  •  While waiting it to dry, I cut out the tail pattern and glue green fabric on it. using wood glue. 
  •  I saw a smaller piece of box inside of it. I think it was the wedge of the oven in the box. So I thought of using it to give a 2D effect. So,I cut out some rock-likes and seaweeds for the effect of our 2D photo-booth stand. 
  • Painted with white on the first layer, then green and a lining of black for an effect. 
  • Once the cut out paint are dried, glue it on the small piece of the box one by one. I used crepe paper as an effect of the water and gold paper for the treasure box. I also use a silver paint to give a shiny effect on my painted seabed

  • For the tail pattern, sorry we haven't got any picture of it. But you can make a tail as what position you want your tail to wiggle effect. 
  • Then we cover the white box with dark and light blue crepe paper and crumpled it for an effect. Then put the tail on. Wrap with green fabric and filled in with cotton. As you see in the pictures above, that's my 2 boys. We tried to take a picture on it and My brother bought a red wig for a props and a torch that we made out of a stick and cellophane.
  • We put it on a place where kids can see it easily. They're having fun of taking pictures with the tails on. My cousins and nephew wore a costumes too for my little mermaid's party.

My cousin Krizia, tried to take a pic with the red wig on and  the torch on her hand.
Even me, got a picture with my tails on... Just ignore the pirate , he just looking for the treasure chest.
So that much pretty it! I hope you like my idea too.

Please leave a comment if you like it for more better suggestions or request. 
Thanks for reading. TATA!


Saturday, November 17, 2012

Let's bake your face with "Baking Soda"


As I browse through the internet regarding with homemade facial mask, my eyes was caught by "Baking Soda". It's so funny that this baking ingredient can be called as an all-purpose baking soda. I've tried it with my canker sore and it's so painful remedy, we can use it as bleach for our laundry, we can use it as a cleanser and it takes away bad odor and it can whiten our teeth too. So I tried it and make some review about how well to use it as a facial mask. I heard too that it's a good home remedy for your acne too.

  • I made a paste-like baking soda solution and applied it on my face.
  • The first application was a bit prickly but as it dries longer, it becomes colder and I can feel my face skin was tighter.
  •  I leave it and dry it for another 30 minutes.
  • W hen I see the mask was dried and cracking, I washed my face with my Facial wash.
  •  After washing it, my face feels so smooth and it was lighten up. As I read it has a exfoliating power that makes my face lighter. And I swear it really works.

I'm not sure if I'm going to recommend this as a facial mask because we're not have the same type of skin. Some have sensitive skins and some are more.... But for me it a two thumbs up! Aside of its cheaper that facial mask that I usually use, it has a lot purpose that helps me to do. 
So, just go ahead and see it for yourself.


Thanks for reading and hope ya'll like it!
TATA!